
Minecraft Rail Recipe: Your Complete Guide to Crafting and Using Rails in 2026
Rails are one of the most versatile transportation tools in Minecraft, transforming how players move resources, livestock, and themselves across their worlds. Whether you’re hauling materials from a distant mine or building an elaborate subway system beneath your base, understanding how to craft and use rails efficiently can save hours of walking and make your builds significantly more functional.
This guide breaks down everything players need to know about rail recipes in Minecraft, from the basic crafting patterns to advanced track designs that maximize speed and automation. By the end, you’ll know exactly which rails to use, how to gather materials efficiently, and how to avoid the common pitfalls that trip up new builders.
Key Takeaways
- The basic minecraft rail recipe requires only 6 iron ingots and 1 stick, yielding 16 rails per craft—making it the most cost-effective foundation for any minecart transportation system.
- Powered rails are essential for long-distance travel, with optimal spacing of 1 powered rail every 38 blocks on flat terrain to maintain maximum speed while minimizing gold consumption.
- Rails in Minecraft come in four types—standard, powered, detector, and activator—each serving unique purposes from basic track to automation and redstone integration.
- Unpowered powered rails act as brakes; always power them with redstone torches, blocks, or detector rails to maintain minecart momentum and prevent unexpected stops.
- Testing track sections before full construction and using cheap blocks like cobblestone or dirt for rail platforms saves both time and valuable materials.
What Are Rails in Minecraft?
Rails are placeable blocks that create tracks for minecarts to travel on. They’re the backbone of any minecart system, whether you’re building a simple point-to-point route or a complex network spanning thousands of blocks.
In Minecraft, rails come in four distinct types: standard rails, powered rails, detector rails, and activator rails. Each serves a unique purpose. Standard rails provide the foundation, they’re the cheapest and most abundant, forming the majority of any track. Powered rails add acceleration and maintain momentum. Detector rails trigger redstone signals when minecarts pass over them. Activator rails interact with specific minecart types, like disabling hoppers or ejecting mobs.
Rails automatically adjust their orientation when placed. They connect to adjacent rails, curve around corners, and even slope upward or downward to create elevation changes. This makes building tracks relatively intuitive once you understand the basic mechanics.
The key difference between rail types lies in their recipes and functions. Standard rails are dirt-cheap and craft in large batches. The specialized variants require more expensive materials like gold and redstone, but they unlock automation and speed that make long-distance travel viable.
Understanding the Basic Rail Recipe
The basic rail is your bread-and-butter track piece. It’s inexpensive, crafts in bulk, and forms the foundation of every rail system in the game.
Materials Needed for Crafting Rails
To craft standard rails, players need only two materials:
- 6 Iron Ingots: Smelt iron ore in a furnace to produce ingots. Iron is abundant in caves and mines, especially between Y-levels -64 and 16 in the 1.18+ world generation.
- 1 Stick: Craft sticks from two wooden planks arranged vertically in the crafting grid.
That’s it. No redstone, no gold, just iron and wood. This simplicity makes rails accessible even in the early game once you’ve established basic mining operations.
Step-by-Step Crafting Instructions
- Open your crafting table (you’ll need the 3×3 grid, a 2×2 inventory grid won’t work).
- Place 6 iron ingots in two vertical columns on the left and right sides of the grid (3 ingots per column).
- Place 1 stick in the center bottom slot of the middle column.
- Collect 16 rails from the output slot.
The recipe yields 16 rails per craft, which is generous compared to powered rail recipes. This 16-to-1 ratio means a single stack of iron ingots (64 ingots) produces over 170 rails, enough to build a substantial track between locations.
One common mistake: trying to craft rails in your inventory grid. The recipe requires all three columns of a crafting table, so keep one nearby when building your rail network.
Different Types of Rails and Their Recipes
Beyond the basic rail, Minecraft offers three specialized variants that enable automation, speed control, and redstone integration.
Powered Rails: Recipe and Crafting Guide
Powered rails are essential for maintaining speed on long tracks and climbing slopes. Without them, minecarts quickly lose momentum and stop moving.
Materials needed:
- 6 Gold Ingots: Smelt gold ore or raw gold in a furnace. Gold spawns most commonly in the Badlands biome and at lower Y-levels.
- 1 Stick: Same as standard rails.
- 1 Redstone Dust: Mine redstone ore (found below Y-level 16) with an iron pickaxe or better.
Crafting process:
- Open your crafting table.
- Place 6 gold ingots in two vertical columns (left and right sides).
- Place 1 stick in the center bottom slot.
- Place 1 redstone dust in the center middle slot.
- Collect 6 powered rails from the output.
The recipe yields only 6 powered rails compared to 16 standard rails, making them significantly more expensive. Gold’s relative scarcity means players should use powered rails strategically rather than for entire tracks. Many efficient rail system designs space powered rails every 38 blocks on flat terrain to maintain maximum speed while minimizing gold consumption.
Powered rails require activation from a redstone signal to function. Unpowered, they act as brakes. Powered, they accelerate minecarts to maximum speed (8 m/s).
Detector Rails: Recipe and Crafting Guide
Detector rails output a redstone signal when a minecart passes over them, enabling automated systems like station gates, cargo sorters, and track switches.
Materials needed:
- 6 Iron Ingots
- 1 Stone Pressure Plate: Craft from 2 stone blocks (not cobblestone, smelt cobblestone into stone first).
- 1 Redstone Dust
Crafting process:
- Open your crafting table.
- Place 6 iron ingots in two vertical columns.
- Place 1 stone pressure plate in the center bottom slot.
- Place 1 redstone dust in the center middle slot.
- Collect 6 detector rails.
Detector rails are primarily used at stations and junctions. They can power adjacent powered rails, trigger note blocks for arrival notifications, or activate pistons for automatic cargo unloading. Their redstone output lasts only while a minecart is on the rail, making them perfect for temporary signals.
Activator Rails: Recipe and Crafting Guide
Activator rails are the most specialized variant, interacting with specific minecart types when powered.
Materials needed:
- 6 Iron Ingots
- 2 Sticks
- 1 Redstone Torch: Craft from 1 redstone dust and 1 stick.
Crafting process:
- Open your crafting table.
- Place 6 iron ingots in two vertical columns.
- Place 2 sticks in the center column (middle and bottom slots).
- Place 1 redstone torch in the center middle slot (replacing one stick).
- Collect 6 activator rails.
When powered, activator rails perform several functions:
- Eject mobs and players from minecarts
- Disable hopper minecarts (stopping them from collecting items)
- Shake minecarts with command blocks
- Ignite TNT minecarts
They’re less commonly used than powered or detector rails but essential for specific automated systems, particularly mob farms and item sorting facilities.
How to Obtain the Materials for Rail Crafting
Gathering materials efficiently determines how quickly you can build extensive rail networks. Here’s how to stockpile what you need.
Finding and Mining Iron Ore
Iron is the primary material for rail crafting. Since the 1.18 Caves & Cliffs Part II update, iron ore distribution changed significantly.
Best Y-levels for iron:
- Y = 16: The single best level for iron concentration
- Y = 232: A secondary peak in mountain biomes
- Range -64 to 320: Iron generates throughout, but peaks at specific levels
Mining strategy:
Branch mine at Y-level 16 for maximum efficiency. Iron veins can be massive (up to 9 blocks), so thoroughly explore around any ore you find. Use a Fortune III pickaxe if you have one, while it doesn’t multiply iron ore drops, it does work on copper and other ores you’ll encounter, maximizing your mining trip efficiency.
Smelt iron ore or raw iron in a furnace or blast furnace (twice as fast). For bulk smelting, set up multiple furnaces or use a blast furnace with a hopper feeding system.
Gathering Sticks and Wood
Sticks are trivial to obtain but easy to overlook when building large networks.
Quick stick farming:
- Chop any tree type, oak and birch are fastest to harvest
- Convert logs to planks (1 log = 4 planks)
- Convert planks to sticks (2 planks = 4 sticks)
- A single log yields 8 sticks
For major rail projects, dedicate a few minutes to chopping a full inventory of logs. This provides hundreds of sticks, enough for thousands of rails. Automated tree farms using pistons or TNT can supply infinite wood if you’re planning truly massive networks.
Collecting Gold and Redstone for Special Rails
Gold and redstone are the bottlenecks for powered rails.
Gold farming:
- Badlands biome: Gold generates at all Y-levels here, with increased frequency, this is the best biome for gold farming
- Underground (Y = -16): Peak gold concentration in non-Badlands biomes
- Nether gold ore: Found throughout the Nether: drops 2-6 gold nuggets (9 nuggets = 1 ingot)
- Zombie Piglin farms: Automated gold farms can produce thousands of ingots per hour
For early-game powered rail crafting, prioritize Badlands mining or Nether expeditions. Late-game, a zombie piglin farm eliminates gold scarcity entirely.
Redstone farming:
- Y = -64 to -32: Highest redstone concentration
- Deep slate redstone ore: Drops 4-5 redstone dust per block
- Use Fortune III: Increases drops to up to 8 redstone dust per ore block
Redstone is abundant at deep levels. A single Fortune III mining session typically yields several stacks, enough for hundreds of powered rails. Focus on strip mining at Y = -58 for combined access to redstone, diamonds, and lapis lazuli.
Building Your First Minecart Track System
Once you’ve crafted your rails, actual track construction is straightforward, but a few tricks make the process smoother.
Placing Rails Correctly
Rails automatically orient themselves based on adjacent blocks and rails. Right-click (or use your placement button) on any solid block to place a rail.
Rail placement rules:
- Rails connect to adjacent rails within one block horizontally
- Rails can slope up or down one block per rail piece
- Maximum slope is 1:1 (45 degrees), you can’t create steeper inclines
- Rails can’t be placed in mid-air: they require a solid block underneath
For elevated tracks, build a platform using cheap blocks like cobblestone or dirt. Many builders use fences or walls as supports under rails for aesthetic reasons, but the rails themselves need full blocks directly beneath them.
Slopes and elevation:
When building upward, place a rail on ground level, then place a block in front and one block higher. Place the next rail on top of that block, it automatically creates a sloped connection. Minecarts climb slopes easily with powered rails but struggle without them.
Many detailed track building tutorials demonstrate advanced techniques like spiral staircases and vertical drops, but mastering basic straight tracks and gentle slopes covers 90% of practical builds.
Connecting Rails and Creating Turns
Rails automatically curve when placed in an L-shape. Place two perpendicular straight rails that connect at a corner, the game creates a curved rail section.
Turn mechanics:
- Curved rails reduce minecart speed slightly
- Powered rails can’t curve, always place powered rails on straight sections
- Rails create four-way junctions if placed in a + shape, but minecarts always continue straight or turn 90 degrees, never sharply
For controlled junctions and switches, use detector rails and powered rails with redstone logic. A simple lever can switch between two directions by powering different rail paths.
T-junction design:
To create a track that splits, build a T-shape with standard rails, then place a powered rail at the junction. Power the rail to send carts in one direction, or leave it unpowered for the other direction. This creates a manual switch for track selection.
Using Powered Rails for Speed and Momentum
Powered rails are expensive, so using them efficiently is crucial for cost-effective track building.
Spacing Powered Rails Efficiently
On flat terrain, a single powered rail maintains momentum for exactly 38 blocks before the minecart begins slowing. This means optimal flat-track spacing is:
1 powered rail → 37 standard rails → 1 powered rail → 37 standard rails…
This pattern maintains maximum speed (8 m/s) indefinitely while minimizing gold consumption. Testing in creative mode confirms this maintains full speed over thousands of blocks.
Uphill powered rail spacing:
Slopes require more powered rails. For continuous upward slopes, place a powered rail every 4 blocks to maintain momentum. Some builders use every 3 blocks for guaranteed climbing speed, but every 4 blocks works reliably for single-cart systems.
Downhill tracks:
Gravity provides free acceleration downhill. You can use standard rails exclusively on descents, powered rails aren’t necessary. But, placing a few powered rails at the bottom of long descents helps carts regain maximum speed quickly.
Starting boost:
Place 3-4 consecutive powered rails at station departure points. This accelerates minecarts from a standstill to full speed within a few blocks, making launches smooth and responsive.
Powering Rails with Redstone
Powered rails require an active redstone signal to function. Several methods work:
Redstone torches:
Place a redstone torch next to a powered rail or beneath the block supporting it. The torch powers the rail and up to 8 adjacent powered rails in a line. This is the simplest method for short powered rail sections.
Redstone blocks:
Place a redstone block adjacent to or beneath a powered rail. Redstone blocks provide permanent power without requiring a torch. They’re more expensive but cleaner for aesthetic builds.
Detector rails:
When a minecart passes over a detector rail, it powers adjacent blocks for 1 redstone tick. Place detector rails immediately before powered rail sections to create self-activating tracks. This works brilliantly for station entrances, carts trigger their own acceleration.
Levers and buttons:
For manual control, attach a lever to a block adjacent to powered rails. Flip the lever to power or depower the section. This creates track switches and allows players to control cart flow manually.
Advanced power distribution:
Redstone repeaters can extend signals beyond the standard 15-block range. For long sections of powered rails (like continuous uphill climbs), place repeaters every 15 blocks to maintain power throughout the section.
Advanced Rail Tips and Tricks
Once you’ve mastered basic rail crafting and track building, these advanced techniques unlock serious functionality.
Creating Automatic Minecart Stations
Automated stations make rail systems feel professional. Here’s a simple design:
Basic auto-launch station:
- Create a platform with a stopping point (use an unpowered powered rail as a brake)
- Place a detector rail in front of the brake rail
- Connect the detector rail to powered rails using redstone
- When a player sits in the minecart, the detector rail triggers and powers the launch rails
This creates a pressure-sensitive launch system. The cart doesn’t move until occupied, then automatically accelerates to full speed.
Cart return system:
For round-trip routes, build a turnaround loop at each end. Use detector rails to trigger a powered rail boost that sends the cart back in the opposite direction. Add a one-minute timer using redstone repeaters to prevent instant returns, giving players time to disembark.
Item sorting with minecarts:
Hopper minecarts automatically collect items they pass over. Combine this with activator rails to disable collection at specific points, creating automated item transport systems. Many modded rail systems expand on this concept with sorting chests and filtered hoppers, but vanilla mechanics support basic automation.
Building Efficient Transportation Networks
Large-scale rail networks require planning to avoid wasted materials and confusing layouts.
Hub-and-spoke design:
Build a central station with rails branching to key locations (main base, farms, mines, villages). This minimizes total track length compared to connecting every location to every other location.
Elevation strategy:
When possible, build tracks at a consistent Y-level. This reduces powered rail consumption on slopes and makes navigation more intuitive. Y = 64 (old sea level) is a common choice for overworld networks.
Nether highways:
Rails in the Nether are 8x more efficient than in the Overworld due to coordinate scaling. A 1,000-block trip in the Overworld requires only 125 blocks of track in the Nether. For very long distances, build a Nether portal at each endpoint and connect them with Nether rails.
Coordinate markers:
Place signs at regular intervals showing coordinates and destinations. This prevents getting lost in complex networks and helps with troubleshooting broken sections.
Parallel tracks:
For high-traffic routes, build two parallel one-way tracks instead of a single bidirectional track. This prevents collisions and allows continuous cart flow in both directions. Space parallel tracks 2-3 blocks apart for easy access.
Glass enclosures:
In hostile areas (deep caves, the Nether), enclose tracks in glass or other transparent blocks. This prevents mob interference while maintaining visibility. Glass is cheap (sand + furnace) and blends into most environments.
Common Mistakes to Avoid When Crafting and Using Rails
Even experienced players make these errors when building rail systems.
Mistake #1: Using only standard rails
New players often build long tracks with standard rails only, then wonder why their minecart stops after 50 blocks. Standard rails don’t maintain momentum, they gradually slow carts to a halt. Always incorporate powered rails for distances beyond 30 blocks.
Mistake #2: Powering every rail
The opposite problem: some players power every single rail in their track, wasting massive amounts of gold. Use the 1:37 spacing ratio on flat terrain to save resources.
Mistake #3: Forgetting to power powered rails
Unpowered powered rails act as brakes. If your cart stops suddenly on what looks like a normal track, check for unpowered powered rails. They appear darker/inactive when not receiving redstone signals.
Mistake #4: Building impossible slopes
Rails can’t climb more than one block vertically per rail piece. Attempting steeper slopes causes rails to break or refuse placement. If you need significant elevation change, build a gradual staircase or use water elevators alongside your rail system.
Mistake #5: Mixing rail types incorrectly
Powered rails can’t curve. Trying to place them on corners breaks the rail or creates unexpected track behavior. Always use standard rails for turns and curves, placing powered rails only on straight sections.
Mistake #6: Insufficient starting boost
A single powered rail at a station often isn’t enough to accelerate a minecart to full speed, especially uphill. Use 3-4 consecutive powered rails at departure points for reliable launches.
Mistake #7: Not accounting for cart type
Chest minecarts, hopper minecarts, and TNT minecarts are heavier than empty minecarts. They require slightly more frequent powered rails to maintain speed, roughly every 30 blocks instead of 38. If cargo carts keep stopping, add more powered rails.
Mistake #8: Building without testing
Always test track sections before committing to long builds. Place a minecart and ride the route yourself to identify slow spots, gaps, or incorrect slopes. It’s much easier to fix 20 blocks of track than 200.
Mistake #9: Using valuable blocks under rails
Rails don’t care what block they sit on. Use cheap materials like dirt, cobblestone, or netherrack for rail platforms. Save your valuable blocks for actual builds.
Mistake #10: Ignoring chunk borders
Rails at chunk boundaries can behave oddly if chunks unload while you’re traveling. For very long automated systems, consider using spawn chunk mechanics or keep chunks loaded with player activity to prevent mid-journey stops.
Conclusion
Mastering rail recipes and track building transforms how you experience Minecraft. From simple point-to-point tracks connecting your base to a mine, to elaborate multi-station networks spanning entire continents, rails provide fast, reliable transportation that scales with your ambitions.
The basic rail recipe, 6 iron ingots and a stick yielding 16 rails, gives you cheap, abundant track. Powered rails add speed and climbing ability at the cost of gold and redstone. Detector and activator rails unlock automation for players ready to experiment with redstone logic.
Start simple. Build a basic track to your nearest mine using the 1:37 powered rail spacing. Experiment with turns, slopes, and stations. As your resource stockpiles grow, expand your network with Nether highways, automatic stations, and parallel tracks for high-traffic routes.
The materials are accessible, the mechanics are forgiving, and the potential for creative transportation systems is nearly limitless. Whether you’re hauling shulker boxes full of diamonds or just tired of walking, rails remain one of Minecraft’s most satisfying building systems to master.
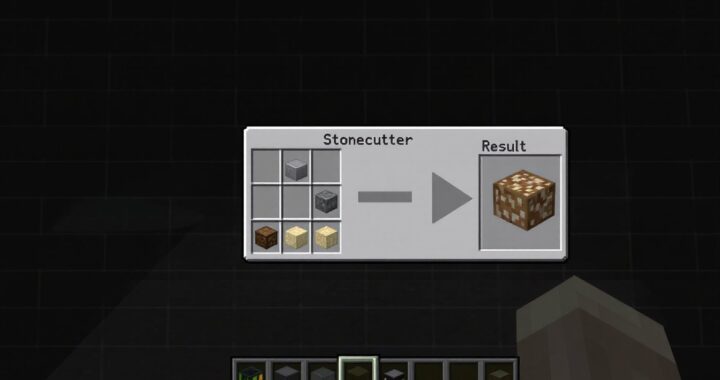 Stonecutter Recipe: Complete Crafting Guide for Minecraft 2026
  How to Make Cake in Minecraft: A Complete Crafting Guide for 2026
 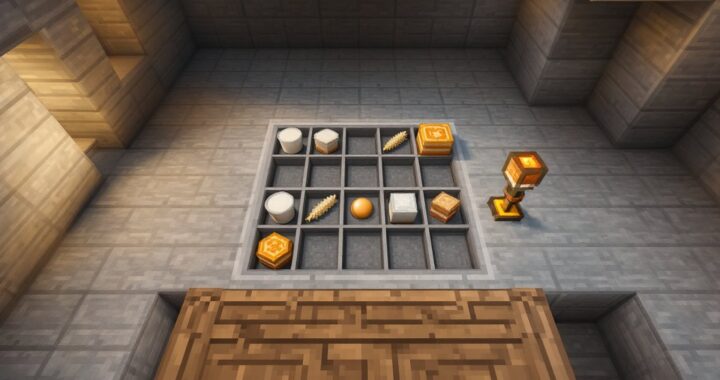 How to Craft a Cake in Minecraft: The Complete Recipe Guide for 2026
  How to Craft an Armor Stand in Minecraft: A Complete Recipe & Usage Guide
  How To Make a Cake In Minecraft: Complete Crafting Guide for 2026
  Minecraft Recipe Book: The Ultimate Guide to Unlocking and Mastering Crafting in 2026