
Hogwarts Legacy Brooms: Complete Guide to Flying, Unlocking, and Upgrading Every Broomstick
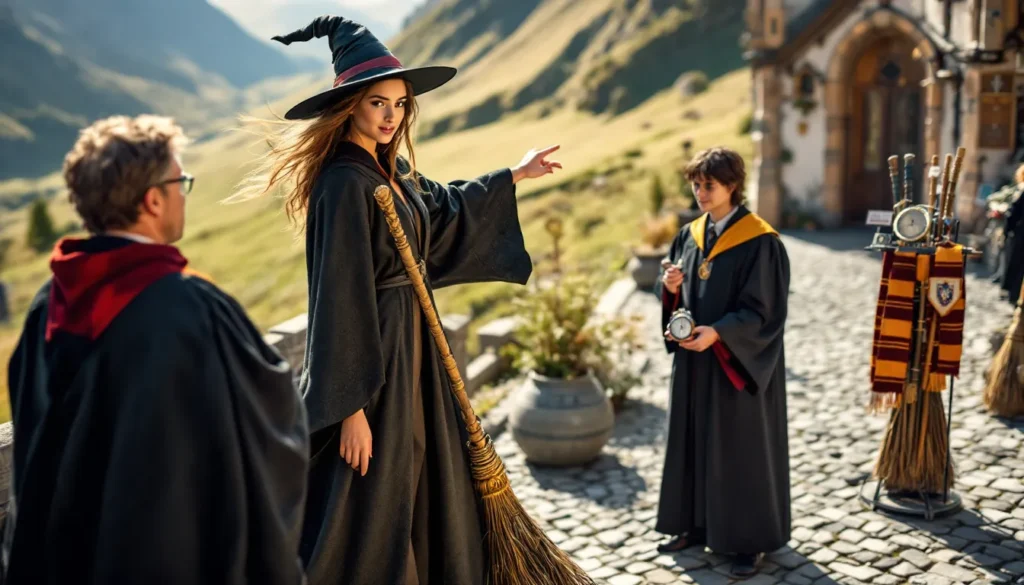
Flying through the skies of the Scottish Highlands on a broomstick is one of the most satisfying experiences in Hogwarts Legacy. But getting airborne isn’t instant, there’s a progression system that gates your access to flight, a variety of brooms to choose from, and upgrade paths that dramatically change how fast you’ll zip across the map. Whether you’re hunting down collection chests, racing against Imelda Reyes, or just tired of running everywhere, understanding the broom system will save you hours of travel time and open up exploration opportunities you’d otherwise miss. This guide breaks down everything: how to unlock flying, every broom available in the game, the upgrade system, speed differences, flight controls, and tips for dominating races and challenges.
Key Takeaways
- Hogwarts Legacy brooms unlock after completing the Flying Class quest around level 7-10, then you can purchase your first broomstick from Sprintwitches Sporting Needs for 600 Galleons.
- All 13 brooms in the game have identical base speed and stats; cosmetics are the only difference between models before upgrades.
- Complete Imelda Reyes’ three-tier time trial challenges to unlock speed upgrades that dramatically increase broom performance by 30-40% at maximum tier.
- Master the boost pulse technique—release your boost when the meter reaches 20-30% to let it recharge, then boost again for higher average speeds than full-drain cycling.
- Use elevation strategically by diving from high altitude to build speed naturally and cutting inside angles tightly during races to follow the optimal racing line.
How to Unlock Flying and Your First Broom in Hogwarts Legacy
You won’t get your hands on a broomstick right away. Flight is locked behind story progression, and you’ll need to complete a specific main quest before you can even purchase one.
Completing the Flying Class Quest
The quest that unlocks flying is called Flying Class, and it becomes available after you’ve progressed through the early main story missions. You’ll need to complete the Jackdaw’s Tomb main quest first, which typically happens around level 7-10 depending on how much side content you’ve tackled.
Once Jackdaw’s Tomb is done, Madam Kogawa will send you an owl inviting you to Flying Class. Head to the marked location on your map, usually the Quidditch pitch area, and you’ll participate in a tutorial that teaches you the basics of broom flight. This is a straightforward mission: you’ll learn how to take off, steer, and boost while following Everett Clopton through a series of rings.
After completing the Flying Class, you don’t automatically get a broom. Instead, you unlock the ability to purchase one from a vendor.
When You Can Start Flying Around the Map
Immediately after finishing Flying Class, head to Sprintwitches Sporting Needs in Hogsmeade. This is the broom shop, and the vendor Albie Weekes will sell you your first broomstick. The cheapest option is the Ember Dash Broom for 600 Galleons. If you’ve been looting chests and selling gear, you should have enough by this point.
Once purchased, your broom is added to your tool wheel (hold L1 on PlayStation, LB on Xbox, or Tab on PC). You can summon it anytime you’re outdoors, just don’t try to fly indoors or in restricted areas like Hogsmeade’s buildings. The moment you mount up, the entire map opens for vertical exploration, and fast travel becomes less necessary for short-to-medium distances.
All Brooms Available in Hogwarts Legacy
There are 13 total brooms in Hogwarts Legacy, split between standard purchasable models and special edition exclusives. Here’s the full list.
Standard Brooms and Where to Buy Them
All standard brooms are sold at Sprintwitches Sporting Needs in Hogsmeade. Each has a unique cosmetic design, but base speed is identical across all models before upgrades. The pricing varies:
- Ember Dash Broom – 600 Galleons (cheapest option)
- Sky Scythe Broom – 1,500 Galleons
- Moon Trimmer Broom – 2,500 Galleons
- Family Antique Broom – 2,500 Galleons
- Wild Fire Broom – 5,000 Galleons
- Bright Spark Broom – 5,000 Galleons
- Night Dancer Broom – 5,000 Galleons
- Silver Arrow Broom – 5,000 Galleons
- Hogwarts House Brooms (Gryffindor, Slytherin, Hufflepuff, Ravenclaw) – Each costs 5,000 Galleons
You don’t need to buy all of them, cosmetics are the only difference. Pick the one that matches your aesthetic preference or house pride. Once you’ve purchased any broom, you can switch between owned models anytime from your gear menu.
Pre-Order and Special Edition Brooms
Two brooms were locked behind pre-order bonuses:
- Onyx Hippogriff Broom – Included with any pre-order edition
- Thestral Broom – Exclusive to the Deluxe Edition (and the Dark Arts Pack)
These brooms don’t offer any performance advantages, but they feature unique creature-themed designs that aren’t available elsewhere. If you didn’t pre-order or grab the Deluxe Edition, you’re out of luck, there’s no in-game way to unlock them post-launch. They’re purely cosmetic flex items.
It’s worth noting that players who grabbed one of these edition-exclusive brooms often debate which broomstick looks best, though performance remains identical across the board.
How to Upgrade Your Broom for Maximum Speed
Base broom speed is fine for casual exploration, but if you want to blaze across the map or win time trials, you’ll need to unlock upgrades. All broom upgrades are tied to a series of side quests given by Imelda Reyes.
Finding Imelda Reyes and Starting Upgrade Quests
After completing Flying Class and purchasing your first broom, return to the Quidditch pitch area or check your owl post. Imelda Reyes will eventually send you a quest invitation. The first upgrade quest is called Flight Test, and it unlocks after you’ve done a bit more main story progression (usually around the time you finish the Helm of Urtkot quest or shortly after).
Imelda is a Slytherin student obsessed with speed, and she’ll challenge you to prove your flying skills. Her quests are all time trials scattered across the Highlands.
Completing Time Trials to Unlock Upgrades
There are three upgrade tiers, each unlocked by completing specific time trial challenges:
-
Upgrade 1 – Complete Imelda’s first time trial challenge. This is part of the Flight Test quest. You’ll race through a course near the Quidditch pitch. Beat her time, and you’ll unlock the first speed boost upgrade.
-
Upgrade 2 – After the first upgrade, Imelda will challenge you again in the quest Sweeping the Competition. This trial is tougher and takes you across a longer course in the Highlands. Completing it unlocks the second speed tier.
-
Upgrade 3 – The final upgrade comes from finishing all of Imelda’s time trial locations scattered around the map. There are several optional trials marked by floating balloon clusters, finish them all, then return to Imelda to unlock max speed.
Each upgrade noticeably increases your broom’s top speed and acceleration. The difference between a base broom and a fully upgraded one is significant, you’ll shave minutes off travel time and make previously tight time trials much easier. For players who enjoy optimizing their broom setup, these upgrades are non-negotiable.
Broom Speed Differences: Do They Actually Matter?
Short answer: not before upgrades. Every broom in Hogwarts Legacy, whether it’s the 600 Galleon Ember Dash or the exclusive Thestral, has identical base speed and handling. The only thing that changes performance is the upgrade tier you’ve unlocked through Imelda’s quests.
Once you’ve completed all three upgrades, every broom becomes equally fast. There’s no “fastest broom” in terms of model choice. The Silver Arrow won’t outpace the Family Antique. The pre-order Onyx Hippogriff has the same stats as the cheapest option.
This design choice keeps the system accessible and cosmetic-focused. You’re free to pick whatever broom matches your style without worrying about min-maxing stats. That said, fully upgraded brooms are dramatically faster than base models, roughly 30-40% faster at max tier, with better acceleration out of boosts.
So when someone asks “what is the best broom in Hogwarts Legacy,” the real answer is: whichever one you like the look of, fully upgraded. Speed is a function of your progression, not your purchase.
It’s also worth mentioning that many gaming laptop reviews focus on frame rate performance during high-speed broom flight, as the game can strain mid-tier GPUs when you’re zooming across detailed environments at max upgrade speed.
Mastering Broom Flight Controls and Advanced Techniques
Flight controls are simple to learn but have a few nuances that separate casual flyers from speed demons.
Basic Flight Controls for All Platforms
Here’s the standard control layout:
PlayStation:
- Summon/Mount Broom: Hold L1, select broom from tool wheel
- Ascend: R2
- Descend: L2
- Steer: Left stick
- Boost: X (tap for short burst, hold for sustained boost)
- Dismount: Circle
Xbox:
- Summon/Mount Broom: Hold LB, select broom from tool wheel
- Ascend: RT
- Descend: LT
- Steer: Left stick
- Boost: A (tap or hold)
- Dismount: B
PC (Keyboard & Mouse):
- Summon/Mount Broom: Tab, click broom icon
- Ascend: Spacebar
- Descend: Ctrl
- Steer: Mouse movement
- Boost: Shift
- Dismount: X or Ctrl
Flight is relatively forgiving, there’s no stamina system, and you can’t crash and take damage. You’ll auto-level if you let go of ascend/descend inputs.
Boosting, Drifting, and Speed Techniques
Boosting is your primary tool for speed. Tapping the boost button gives a short burst, while holding it sustains acceleration as long as your boost meter (the blue bar on-screen) lasts. The meter recharges automatically when you’re not boosting, so the optimal technique is to pulse your boosts, hold until the meter is nearly empty, release to let it recharge halfway, then boost again. This maintains higher average speed than simply holding boost until it drains completely.
Drifting isn’t a formal mechanic like in racing games, but you can carry momentum through turns by angling your ascent/descent during a turn. If you’re rounding a tight corner, descend slightly while steering, you’ll maintain more speed than if you try to turn flat. This is critical for time trials where every second counts.
Another trick: use elevation changes strategically. Diving from high altitude builds speed even without boosting. If you’re traveling long distances, climb high, then angle downward into a glide. You’ll cover ground faster and conserve boost meter for when you need it. Players looking for advanced flight techniques often experiment with dive-bombing into boost chains to maximize velocity during races.
Best Brooms for Racing, Exploration, and Combat
Since all brooms perform identically when fully upgraded, the “best” broom is entirely situational based on your priorities:
For Racing:
Any fully upgraded broom works, but pick one with a sleek, narrow visual profile. The Sky Scythe and Silver Arrow have thinner designs that make it easier to visually judge your position when threading through tight ring clusters in time trials. Some players also prefer darker brooms like the Night Dancer because they contrast better against bright skyboxes, making it easier to spot upcoming rings.
For Exploration:
Go with whatever matches your aesthetic. The Hogwarts House Brooms are popular for roleplay immersion, while the Thestral Broom and Onyx Hippogriff stand out for their unique creature themes. If you’re spending dozens of hours on a broom, you want one you enjoy looking at. The Wild Fire Broom has a particularly eye-catching flame motif that looks great during sunset flights over the Highlands.
For Combat:
Brooms aren’t directly used in combat, you can’t cast spells while mounted. But, you can use them for tactical repositioning during open-world encounters. Mount up, gain altitude, spot enemy groups from above, then dismount and jump into combat with a surprise attack. For this playstyle, any broom works, but having a fully upgraded model lets you disengage and reposition faster if a fight goes south.
If you’re torn between options and want a detailed comparison, ranking guides for every broom model. Eventually, though, once you’ve hit max upgrades, the choice is purely cosmetic, pick the one that feels right for your character.
How to Customize Your Broom Appearance
Broom customization in Hogwarts Legacy is more limited than you might expect. Unlike gear, brooms don’t have transmog or dye systems. You can’t change the color scheme or add attachments to a broom you already own.
Your only customization option is switching between purchased brooms. Open your gear menu, navigate to the broom slot, and select a different model from your collection. The switch is instant and doesn’t cost anything, you can change brooms as often as you like.
If you want variety, you’ll need to buy multiple brooms from Sprintwitches. Since gold becomes abundant in the mid-to-late game (especially if you’re selling excess gear), most players eventually own several models and rotate based on mood or outfit.
There’s no broom naming system, no performance tuning sliders, and no cosmetic attachments. What you see in the shop is what you get. For players hoping for deeper customization, this is one area where the game feels a bit thin compared to other RPG systems.
That said, the broom designs themselves are detailed and varied. Each model has unique handle carvings, bristle patterns, and magical effects (like the flame trails on the Wild Fire or the spectral glow on the Thestral). If you’re into fashion-souls-style gameplay, coordinating your broom with your robe color scheme is about as deep as it gets. Some gaming setup guides even suggest using photo mode to showcase your broom collection against iconic Hogwarts backdrops.
Tips for Winning Broom Races and Challenges
Imelda’s time trials and the scattered balloon races can be frustrating if you’re not used to the flight model. Here’s how to consistently hit gold times:
1. Upgrade First, Race Later
Don’t attempt later trials until you’ve unlocked at least two speed upgrades. The difference is massive, and some courses are nearly impossible at base speed. If you’re struggling, back off and progress the main story until more upgrade quests unlock.
2. Learn the Boost Cadence
Never fully drain your boost meter. Use the pulse technique: boost until the meter is 20-30% remaining, release, let it recharge to 60-70%, then boost again. This keeps your average speed higher than full-drain cycles.
3. Take the Racing Line
In corners, cut inside angles tightly. The rings are usually positioned to guide an optimal racing line, trust them. If a ring is low, descend into it rather than flying high and dipping at the last second. Smooth, flowing inputs beat jerky corrections.
4. Use Elevation for Speed
If a course has a downhill section, dive aggressively. You’ll build speed beyond what boosting alone provides. Conversely, don’t climb unless the course forces it, altitude gains cost speed.
5. Memorize Ring Sequences
Most trials allow retries. Use your first attempt to learn the ring layout, then optimize on subsequent runs. Knowing where the next ring is before you reach the current one lets you pre-angle your approach.
6. Restart Immediately on Mistakes
If you miss a ring or crash into terrain, don’t waste time finishing the run. Pause and restart. Shaving milliseconds off a clean run is easier than recovering from a major error.
7. Platform Performance Matters
On PC, frame drops during high-speed flight can make precise steering harder. If you’re struggling on a mid-range system, consider lowering graphical settings during races. Many tech review sites have noted that stable 60 FPS makes a noticeable difference in broom control responsiveness, especially during tight cornering sequences.
Once you’ve nailed the mechanics, most trials become straightforward. The hardest part is usually the first couple attempts while you’re learning the course. After that, it’s just execution. For players who want detailed walkthroughs of specific trials, there are guides that break down ring-by-ring strategies for every race location.
Conclusion
Brooms in Hogwarts Legacy are one of the game’s most satisfying progression systems. You start grounded, unlock flight through a story quest, purchase your first broomstick, and gradually upgrade to blistering speeds that transform exploration. All brooms perform identically when upgraded, so your choice comes down to aesthetics, whether you prefer house colors, creature themes, or sleek racing designs.
The key takeaway: don’t sleep on Imelda’s upgrade quests. Fully upgraded brooms are game-changers for travel efficiency and racing performance. And once you’ve mastered boost management and racing lines, you’ll be threading through ring courses and crossing the Highlands faster than any Floo Flame network.
Whether you’re chasing collection chests, hunting down Merlin Trials, or just soaking in the scenery from a few hundred feet up, a good broom, any good broom, makes Hogwarts Legacy’s world feel more alive and accessible. Pick the one that speaks to you, max out those upgrades, and enjoy the ride.
 Map Chamber Hogwarts Legacy: Your Complete Guide to Unlocking Secrets and Mastering Ancient Magic
  Sebastian Sallow in Hogwarts Legacy: Complete Character Guide & Quest Walkthrough
  Hogwarts Legacy Herodiana Puzzle: Complete Guide to Solving All 15 Moon Challenges
  Does Hogwarts Legacy Autosave? Everything You Need to Know About Save Systems in 2026
  Hogwarts Legacy Change Appearance: Complete Guide to Customizing Your Witch or Wizard in 2026
  Mallowsweet in Hogwarts Legacy: Complete Farming Guide and Practical Uses (2026)