
Hogwarts Legacy Hall of Herodiana: Complete Guide to Every Puzzle Solution (2026)
The Hall of Herodiana stands as one of Hogwarts Legacy’s most rewarding optional questlines, blending intricate environmental puzzles with some of the game’s best cosmetic rewards. Unlike the main story quests that guide you through combat encounters and dialogue trees, this three-part challenge tests your platforming skills and spatial awareness across multiple castle wings.
Many players stumble into the first moth portrait by accident, only to realize they’ve unlocked a questline that demands precise spell usage and navigation through some of Hogwarts’ most beautifully hidden chambers. The rewards, particularly the exclusive gear pieces, make the effort worthwhile for anyone looking to customize their character’s appearance beyond standard merchant offerings.
This guide breaks down all three Hall of Herodiana puzzles with exact locations, step-by-step solutions, and the specific rewards waiting at each checkpoint.
Key Takeaways
- The Hall of Herodiana is a three-part optional questline in Hogwarts Legacy that rewards players with exclusive cosmetic gear including a cape, attire, and cap featuring constellation designs.
- Success in Hall of Herodiana puzzles requires mastering three utility spells—Accio, Depulso, and Levioso—combined with precise platforming and timing rather than combat skills.
- Each Hall of Herodiana puzzle location (Library Annex, Astronomy Wing, and South Wing) escalates in difficulty, with the final South Wing puzzle combining all mechanics into a demanding gauntlet.
- Common failures stem from rushing the rotating platforms, cycling spells during jumps, and casting Levioso too early; binding essential spells to quick-access slots significantly improves success rates.
- Completing all three Hall of Herodiana puzzles grants 450 XP, exclusive Field Guide pages that unlock lore about Herodiana Byrne’s educational philosophy, and valuable cosmetic transmog options for endgame fashion builds.
What Is the Hall of Herodiana in Hogwarts Legacy?
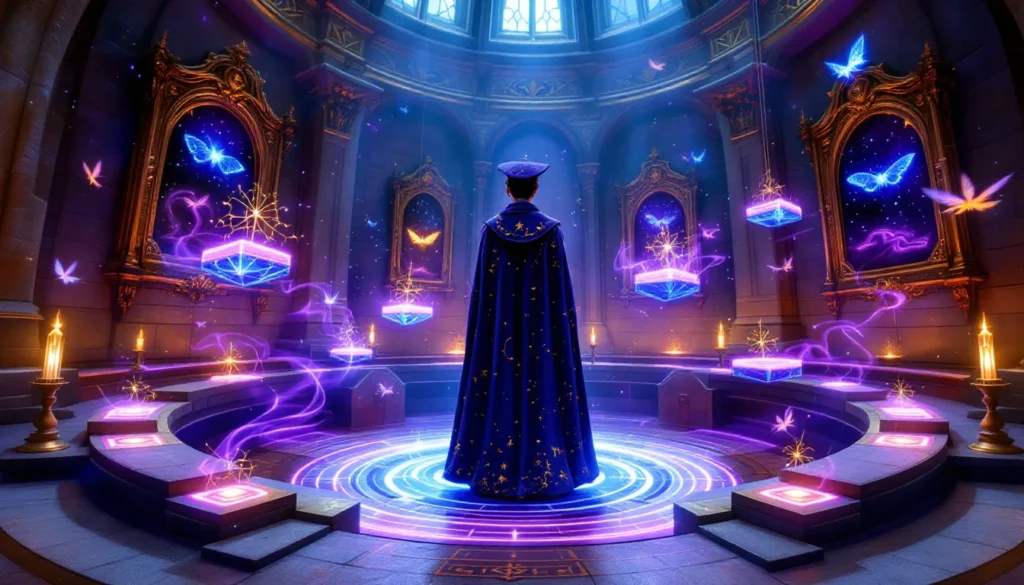
The Hall of Herodiana is a multi-part side quest accessible after progressing through the early story chapters. Named after Herodiana Byrne, a witch obsessed with creating “Depulso puzzle rooms,” this questline centers around finding three moth portraits scattered throughout Hogwarts Castle and solving the environmental challenges behind each one.
Unlike typical fetch quests or combat encounters, the Hall of Herodiana focuses entirely on platforming mechanics and spell-based puzzle solving. Each of the three locations, Library Annex, Astronomy Wing, and South Wing, contains a moth portrait that acts as a gateway to Herodiana’s challenge rooms. These rooms feature moving platforms, timed jumps, and clever use of spells like Accio, Depulso, and Levioso.
The questline doesn’t appear in your main quest log until you interact with the first moth portrait. Once activated, it tracks your progress across all three locations, rewarding you with unique cosmetic gear after each completion. It’s entirely optional but offers some of the most distinctive outfit pieces in the game, making it a priority for players focused on character customization.
How to Unlock the Hall of Herodiana Quest
Required Spells and Abilities
Before attempting any Hall of Herodiana puzzle, you’ll need specific spells unlocked through main story progression:
- Accio: Learned during “The Path to Your Destiny” (Professor Ronen’s class)
- Levioso: Also acquired from Professor Ronen’s assignment
- Depulso: Obtained in “The Hall of Herodiana” quest itself, which triggers after finding the first moth
You don’t need advanced combat spells or unforgivable curses. The puzzles rely entirely on these utility spells and your ability to chain them together. Make sure you’ve progressed past the initial tutorial sections, most players can access this content around level 10-12.
The basic broom is sufficient for reaching the moth portrait locations, though having the upgraded broom flight (unlocked via broom trials) makes navigation slightly faster.
Finding the Moth Portraits to Start the Quest
The questline activates when you discover your first moth portrait. While you can technically find them in any order, the game nudges you toward the Library Annex location first through proximity to main story events.
Each moth portrait appears as a glowing canvas with a missing moth. When you approach, you’ll notice a ghostly moth fluttering nearby. Using Lumos attracts the moth, which then flies toward its portrait frame. Following it leads you into Herodiana’s puzzle chambers.
The three portrait locations are:
- Library Annex (Lower Level, near the Divination classroom area)
- Astronomy Wing (Astronomy Tower, accessible via spiral staircases)
- South Wing (Ground floor, near the Faculty Tower Floo Flame)
Once you find and complete the first puzzle, the quest “Hall of Herodiana” officially appears in your journal, tracking your progress toward finding the remaining two portraits.
Hall of Herodiana Puzzle 1: Library Annex Solution
Moth Frame Location and Navigation
The Library Annex portrait sits on the lower level of the library section, near the Divination Classroom Floo Flame. From the Floo point, head down the nearby staircase and look for a corridor branching left. The moth portrait hangs on the wall in a dimly lit alcove, easy to miss if you’re sprinting through.
Cast Lumos near the portrait frame to reveal the moth. It’ll fly through a nearby doorway, leading you down a previously inaccessible corridor. Follow it until you reach a large circular chamber with floating platforms and several Depulso blocks (the dark cube-shaped objects).
Step-by-Step Puzzle Walkthrough
This first puzzle introduces the core mechanics you’ll use throughout all three locations:
-
Enter the chamber and observe the layout. You’ll see platforms at different heights, with gaps too wide to jump normally.
-
Use Accio on the first Depulso block to pull it toward you, creating a bridge to the next platform.
-
Jump to the second platform, then turn around. You’ll need to use Depulso on the block you just pulled to push it into position as a stepping stone for the next gap.
-
Platform sequence: The middle section requires timing. Pull blocks into position, jump quickly, then reposition them for the next gap. Don’t rush, there’s no timer.
-
Final platform: Use Levioso on the hovering platform to stabilize it, then jump across to reach the chest containing Herodiana’s Cape.
-
Exit chamber: A new doorway opens after collecting the reward, leading back to the main library area.
The Library Annex puzzle serves as the tutorial for the harder challenges ahead, particularly the platforming sections found in side quests like In the Shadow of the Relic. If you’re struggling with the jumping mechanics, try adjusting your camera angle before each leap, the game’s platforming feels more responsive when you’re facing directly toward your landing point.
Hall of Herodiana Puzzle 2: Astronomy Wing Solution
Reaching the Astronomy Tower Moth Portrait
The second moth portrait requires significantly more navigation than the first. Fast travel to the Astronomy Wing Floo Flame, then climb the spiral staircases leading toward the Astronomy Tower observation deck. About halfway up, you’ll find a branching corridor on the right side (heading clockwise).
The portrait hangs in a small alcove with star charts on the surrounding walls. Cast Lumos to attract the moth, which flies upward through a ceiling opening. Follow the glowing trail by continuing up the tower stairs, then through a doorway that only appears after the moth passes through it.
Completing the Platforming Challenges
The Astronomy Wing puzzle ramps up difficulty with moving platforms and timed sequences:
-
Initial platform puzzle: You’ll enter a tall vertical chamber with platforms rotating around a central axis. Wait for the first platform to align, then jump. Rushing here causes most failures.
-
Depulso block section: Pull the block toward you with Accio, ride it as it moves along the track, then quickly cast Depulso to push it into the locking mechanism at the end of the track.
-
Rotating platforms: Three platforms spin slowly around the chamber. Time your jumps to land when they’re closest to your position. Players familiar with platforming challenges in RPGs will recognize this as a classic rhythm-based obstacle.
-
Levioso timing: The final gap requires you to cast Levioso on a floating block while jumping. Cast mid-air, land on the now-stable block, then jump again to the exit platform.
-
Reward collection: The chest contains Herodiana’s Attire (a full outfit piece). Grab it, then use the exit portal that appears.
This puzzle trips up players who try to speed through it. The rotating platforms move at a fixed pace, wait for proper alignment instead of attempting risky jumps. Many guides on sites like Twinfinite recommend practicing the Levioso mid-air cast in the Room of Requirement before attempting this section if you’re struggling.
Hall of Herodiana Puzzle 3: South Wing Solution
Locating the Third Moth Frame
The final moth portrait sits in the South Wing on the castle’s ground floor. Fast travel to the Faculty Tower Floo Flame, then head toward the main corridor connecting to the Great Hall. Before reaching the hall, look for a doorway on your left (when facing the Great Hall entrance) marked by decorative banners.
The portrait hangs in a small study room filled with bookshelves and a writing desk. Use Lumos to reveal the moth, which phases through the back wall. The entrance to Herodiana’s final chamber appears as a previously hidden doorway behind one of the bookshelves.
Solving the Final Puzzle Room
The South Wing combines every mechanic from the previous two puzzles into one extended challenge:
-
Entry chamber: Pull two Depulso blocks into position simultaneously using Accio, creating a staircase effect. You’ll need to position the first block, jump on it, then pull the second while standing on the first.
-
Multi-level platforming: The chamber opens into a three-tier vertical space. Use Depulso to push blocks upward, creating stepping stones between levels. This section demands precise spell aim, missing your target block can reset the sequence.
-
Timed moving platforms: Platforms move in alternating patterns here. Jump to the first, wait for the second to align, then chain three quick jumps in succession. Hesitating mid-sequence causes you to fall back to the checkpoint.
-
Final Levioso gauntlet: Three floating blocks need to be stabilized in sequence while you’re actively jumping between them. Cast Levioso on block one, jump, cast on block two mid-air, land, immediately jump and cast on block three.
-
Reward chamber: The final chest contains Herodiana’s Cap, completing the three-piece cosmetic set.
This puzzle has the highest failure rate of the three, especially during the timed platform section. If you’re stuck, try adjusting your spell keybinds, having Levioso on a quick-access button instead of cycling through your spell wheel makes the final gauntlet significantly easier. Players who’ve completed other optional challenges like In the Shadow of the Mine will find the difficulty comparable.
All Hall of Herodiana Rewards and Collectibles
Unique Gear and Cosmetic Rewards
Completing all three Hall of Herodiana puzzles nets you three exclusive cosmetic pieces that can’t be obtained anywhere else in the game:
- Herodiana’s Cape (Library Annex): A flowing purple cape with gold trim and constellation patterns
- Herodiana’s Attire (Astronomy Wing): A full outfit piece featuring elegant robes with star motifs
- Herodiana’s Cap (South Wing): A matching headpiece that completes the set
These items appear in your gear inventory immediately after collection. They’re purely cosmetic with no stat bonuses, but they can be upgraded using the same tailoring system as any other gear piece. The visual design stands out from standard vendor gear, featuring unique constellation embroidery and a color palette that matches the night sky aesthetic.
The full set works particularly well for players who prefer the “scholarly wizard” look over combat-focused armor designs. You can transmog other gear to these appearances once unlocked, making them valuable for endgame fashion builds.
Field Guide Pages and XP
Beyond the cosmetic rewards, each puzzle completion grants:
- 150 XP per chamber (450 XP total across all three)
- Field Guide Page entries documenting Herodiana Byrne’s story and her obsession with Depulso puzzle rooms
- Collection completion credit toward the “The Good Samaritan” achievement/trophy
The Field Guide pages unlock lore entries explaining Herodiana’s background as a witch who believed magical education should include physical and mental challenges beyond wand work. Her puzzle rooms were designed as training exercises for students, though they were eventually sealed due to safety concerns.
Collecting all three pages contributes to your overall completion percentage, which matters for players targeting 100% game completion. The XP rewards are modest but helpful for mid-game leveling, especially if you’re tackling these puzzles around levels 15-20. Completionists hunting for hidden collectibles throughout Hogwarts should prioritize this questline early.
Tips and Tricks for Completing the Hall of Herodiana
Common Mistakes to Avoid
The Hall of Herodiana punishes certain habits that work fine in combat scenarios:
Spell wheel cycling during jumps: Swapping spells mid-air via the wheel causes input delay. Bind your essential spells (Accio, Depulso, Levioso) to quick-access slots before entering puzzle chambers. PC players should map them to number keys: console players should use the d-pad shortcuts.
Rushing the rotating platforms: The Astronomy Wing’s moving platforms operate on fixed timing. Waiting two extra seconds for perfect alignment is faster than falling and restarting from the checkpoint. Many players familiar with structured puzzle guides understand this pacing principle.
Wrong camera angles: Hogwarts Legacy’s jump distance depends partly on your camera orientation. Face directly toward your landing point and keep the camera level, angling upward or downward affects your arc.
Ignoring checkpoints: Each puzzle auto-saves at certain platforms. If you fall, you’ll respawn at the last checkpoint, not the beginning. Don’t restart manually thinking you’ve failed completely.
Casting Levioso too early: The spell has limited duration. Cast it just before or during your jump, not while standing on the previous platform. Premature casting means the block destabilizes before you land.
Best Strategies for Platforming Sections
These tactics apply across all three puzzle locations:
Practice the Levioso jump combo outside puzzles first: Head to the Room of Requirement or any open area. Spawn a barrel or crate, jump, then cast Levioso on it mid-air. Repeat until it feels natural. This muscle memory makes the South Wing’s final gauntlet manageable.
Adjust your FOV settings: If you’re struggling with depth perception on jumps, try tweaking your field of view in the graphics options. A slightly narrower FOV (around 80-85) can make platform distances easier to judge.
Use the targeting reticle: When casting Accio or Depulso on blocks, the targeting reticle changes color when properly aimed. Wait for the color shift before casting, this prevents missed casts that waste time.
Walk, don’t run, near platform edges: Sprinting increases your jump distance, which can cause overshooting on short gaps. Walk to the edge, then jump. You’ll have more control over your landing.
Sound cues matter: The puzzles include audio cues when platforms lock into position or blocks settle into place. Play with headphones if possible, these cues help with timing, especially in the Astronomy Wing.
Players who’ve tackled other optional content like balancing exploration with main quests will recognize that taking breaks between attempts reduces frustration. If you’re failing the same section repeatedly, exit the chamber and return after completing other activities. Fresh attempts typically perform better than grinding through exhaustion.
Conclusion
The Hall of Herodiana represents some of Hogwarts Legacy’s most creative optional content, rewarding players who venture beyond combat and story quests. The three-piece cosmetic set remains exclusive to this questline, making it essential for completionists and fashion-focused players alike.
While the puzzles demand more precision than most of the game’s other content, the mechanics are forgiving once you understand the timing and spell mechanics. The Library Annex puzzle teaches the basics, the Astronomy Wing tests your timing, and the South Wing combines everything into a final challenge that feels genuinely satisfying to complete.
If you’re stuck on any section, remember that the game checkpoints your progress generously, falling doesn’t mean starting over. Take your time, use the strategies outlined above, and you’ll have Herodiana’s full outfit unlocked before you know it.
 Map Chamber Hogwarts Legacy: Your Complete Guide to Unlocking Secrets and Mastering Ancient Magic
  Sebastian Sallow in Hogwarts Legacy: Complete Character Guide & Quest Walkthrough
  Hogwarts Legacy Herodiana Puzzle: Complete Guide to Solving All 15 Moon Challenges
  Does Hogwarts Legacy Autosave? Everything You Need to Know About Save Systems in 2026
  Hogwarts Legacy Change Appearance: Complete Guide to Customizing Your Witch or Wizard in 2026
  Mallowsweet in Hogwarts Legacy: Complete Farming Guide and Practical Uses (2026)