
Minecraft Farmers: Everything You Need to Know About Growing Your Virtual Farm in 2026

If you’re serious about efficiency in Minecraft, you’ve probably realized that manual farming is a waste of time. Enter the minecraft farmer, one of the most versatile tools in the game for scaling your agricultural output. Whether you’re looking to feed a massive mob grinder, stock up on emeralds for trading, or just build something visually satisfying, understanding how farmers work is the foundation of any advanced farm setup. This guide breaks down everything from basic mechanics to cutting-edge automation tricks that’ll have your virtual crops flowing without lifting a finger.
Key Takeaways
- Minecraft farmers automatically harvest and replant crops during daylight hours, eliminating manual farming and enabling scalable agricultural production with minimal player intervention.
- Optimal farmer setup requires a compact 9×9 to 16×16 crop layout with proper positioning on raised platforms, hoppers for seed supply, and collection systems to maximize efficiency and prevent inventory backup.
- Multiple farmers working in parallel with auto-replanting systems and item sorting create closed-loop operations that feed massive bases indefinitely while minimizing downtime and resource waste.
- Common setup failures like poor positioning, inadequate lighting, inventory mismanagement, and lack of seed supply can be avoided through proper planning and testing in creative mode before survival implementation.
- Advanced farmers minecraft farms integrate water mechanics for item transport, mob-proof designs for security, and connection to grinders or resource pipelines to optimize the entire farming operation.
What Are Farmers in Minecraft and How Do They Work
Understanding Farmer Mechanics and Behavior
Farmers are Minecraft villager types that harvest crops and replant them automatically. Unlike manual harvesting, they do the heavy lifting, literally. When a farmer spots a fully grown crop (wheat, carrots, potatoes, or beetroot), they’ll harvest it, replant seeds, and repeat the process endlessly if left in the right conditions.
A farmer picks up seeds and produce when they mature and will plant seeds in tilled soil within their work radius. The key is positioning: farmers need to be within range of the crops and have access to seeds in their inventory. They work during the day and ignore crops at night, so expect productivity spikes during daylight hours.
Farmers get food from harvesting, carrots and potatoes restore hunger, so they’ll naturally sustain themselves while working. This self-sufficiency makes them ideal for long-term operations. You’ll notice they stop working when they’re full, so managing their inventory prevents backups. The mechanic is straightforward but requires careful setup to maximize yield.
Setting Up the Perfect Farm Layout for Maximum Efficiency
Designing and Optimizing Your Crop Space
Layout is everything. The best farms for minecraft follow a simple principle: minimize walking distance and maximize crop density. A rectangular layout with rows of tilled soil works best, but your farmer needs accessible paths.
Start with these essentials:
- Crop rows: Place tilled soil in straight lines 2 blocks wide, separated by water channels or paths
- Farmer placement: Position villagers on raised platforms overlooking the crops so they can see and access everything
- Seed supply: Keep a hopper connected to the farmer’s position, feeding seeds directly into their inventory
- Output collection: Use hoppers and minecarts below the farm to catch harvested crops automatically
The ideal setup uses a 9×9 to 16×16 crop area per farmer, anything larger and they’ll waste time walking. Water channels break up monotony and actually help: farmers can traverse water slowly, and you can use the water to push crops toward collection points.
For minecraft villager farms, height matters. Raising the farmer one or two blocks above the crops gives them better sight lines and prevents them from getting stuck in the rows. Test your layout with a single villager first, if they’re constantly moving and harvesting, you’ve nailed the spacing.
Essential Resources and Building Your First Farmer Station
Before you start, gather the basics: wood for composters, hoppers, a workstation block (composter), water buckets, and dirt or farmland. You’ll also need at least one minecraft villager in farmer profession, grab a jobless villager and place a composter nearby to convert them.
Step-by-step setup:
- Find or breed your farmer – Locate a village or breed villagers from scratch. A single villager is enough to start: you can scale up later.
- Build the farm area – Create tilled farmland in a compact, accessible layout. Use bone meal to speed up initial crop growth if needed.
- Set up item collection – Place hoppers beneath the farm leading to a chest or barrel. This prevents items from despawning.
- Add a seed feeder – Use a dispenser or hopper to keep seeds flowing into the farmer’s inventory. Without seeds, they stop working.
- Install lighting – Crops need light to grow: ensure you have torches or other light sources covering the farmland.
- Test the workflow – Watch your farmer for a full day-night cycle. They should harvest mature crops and replant seeds consistently.
You can build this in survival mode with about 30 minutes of prep work. The initial investment pays off immediately, one farmer produces far more than manual harvesting ever could.
Advanced Farming Techniques and Automation Tips
Once you’ve mastered the basics, scaling up transforms your farms for minecraft into industrial operations. The secret is redundancy and logistics.
Multiple farmers working in parallel multiply output. Three farmers covering different crops can feed a massive base indefinitely. Stack them vertically to save horizontal space, just ensure each has clear sight lines to their assigned crop area.
Auto-replanting systems prevent downtime. Instead of manually feeding seeds, connect a hopper system that auto-collects harvested seeds and cycles them back into the farm. This creates a closed loop where your farmer never runs out of seeds.
Item sorting separates crops from seeds post-harvest. Seeds go back to the farmer: actual produce goes to storage. Use a basic sorting hopper or a more complex redstone contraption depending on your preference.
Water mechanics matter more than people think. Flowing water pushes items but drowns villagers, so keep them on solid ground with water channels nearby for item transport. Some advanced setups use water streams to move crops directly to hoppers, cutting collection time dramatically.
The iron farm minecraft concept applies here too, if your farm feeds mobs for XP or resources, optimize the entire pipeline. Make sure your farmer station connects directly to grinder input, minimizing storage delays.
You can check detailed automation guides on community-driven platforms and farming-specific wikis for region-specific optimization.
Common Mistakes to Avoid When Building Farmer Setups
New farmers make predictable errors. Watch out for these pitfalls:
Poor positioning – Placing your farmer too far from crops means they’ll wander aimlessly instead of harvesting. Keep them within 16 blocks of the farmland.
Inventory mismanagement – A full farmer stops working. They’ll sit idle even surrounded by ripe crops. Design your hopper system to pull items every few minutes, or accept that you’ll need to manually unload occasionally.
Inadequate lighting – Crops won’t grow without proper light levels. Use bone meal early on, then ensure you have at least 8 light from torches or other sources covering the farmland.
No seed supply – Without seeds in their inventory, farmers can’t replant. Some players forget to set up a seed dispenser and wonder why production stalls.
Exposing farmers to mobs – Zombies ignore farmers, but creepers and other mobs can destroy your setup. Build walls or use mob-proof designs for security.
Ignoring day-night cycles – Farmers work slower or not at all at night. Don’t plan your base around a single farm expecting 24/7 output without additional strategies like sky farms with permanent daylight.
The Minecraft community wiki has detailed breakdowns of common farm mechanics if you want to dive deeper. Testing in creative mode before committing to survival is always smart, it costs nothing and saves frustration.
 Sheep In Minecraft: Your Complete Farming & Breeding Guide For 2026
  Minecraft Saddle Recipe: Why You Can’t Craft One and How to Get It Fast in 2026
 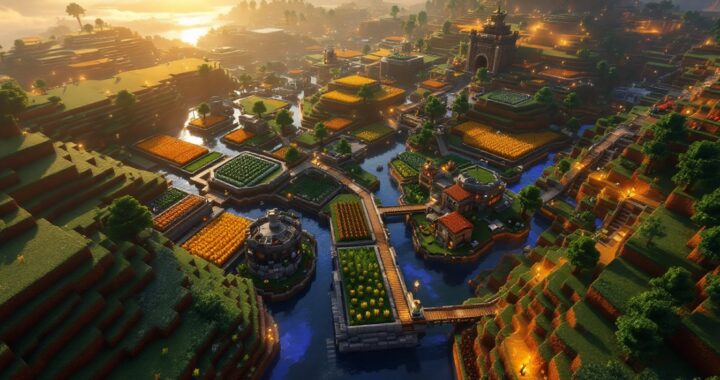 The Ultimate Guide to Minecraft Farms: Boost Your Survival Game in 2026
  How to Breed Villagers in Minecraft: A Complete Guide for 2026
 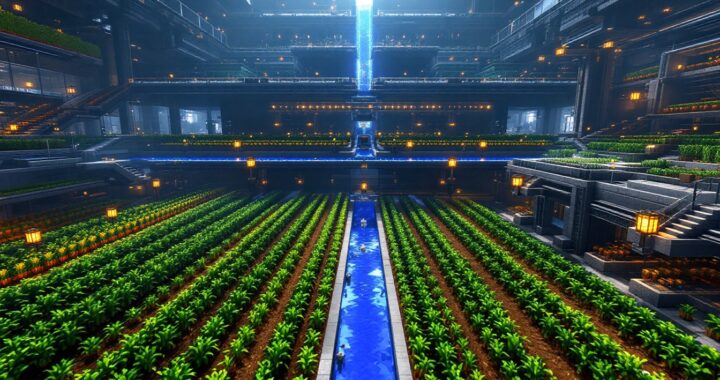 The Complete Guide to Minecraft Farms: Build, Automate, and Maximize Your Yields in 2026
  Minecraft Potion Recipes: The Complete Brewing Guide for 2026