
Minecraft Villager Trading Guide 2026: Maximize Emeralds and Master Every Deal
Villager trading is the backbone of any serious Minecraft economy. Whether you’re chasing enchanted gear, rare blocks, or just want to stop mining diamonds by hand, understanding how to trade effectively with villagers separates casual players from those who actually progress efficiently. This guide covers everything from basic mechanics to advanced discount strategies and hall optimization for versions 1.20–1.21/26.1, so you can build a trading system that turns minimal resources into maximum returns.
Key Takeaways
- A Minecraft villager trading system built with Farmers, Fletchers, and Librarians generates unlimited emeralds while minimizing manual resource gathering.
- Reroll Librarian offers before completing any trade by breaking and placing lecterns repeatedly until you unlock essential enchanted books like Mending, Unbreaking III, and Fortune III.
- Zombification curing—converting villagers to zombie villagers and curing them with Weakness potions and golden apples—permanently discounts their trades, eventually dropping costs to 1 emerald per transaction.
- Restocking requires villagers to access their job site blocks during daytime working hours with clear pathfinding, so organize your trading hall with ground-level workstations and minimal obstacles.
- A well-designed villager trading hall isolates each profession in dedicated cells with beds and workstations, enabling efficient bulk trading and zombie conversion without villagers escaping or despawning.
- Hero of the Village status from winning raids provides significant additional discounts across your entire trading economy for 100+ in-game minutes.
How Villager Trading Works: Core Mechanics and Economics
Villagers with assigned professions will trade with you using emeralds as currency. Right-click any adult villager (Java) or interact with them (Bedrock) to open the trade menu. Each trade consists of input items and an output: completing trades awards XP to both you and the villager.
Trade stock is limited. Once a villager exhausts their stock on a particular trade, that transaction locks until they restock. Restocking happens during working hours (morning to midday in-game) if the villager can pathfind to their job site block. If they can’t access it, they won’t refresh trades.
Understanding Trading Levels and Profession Assignments
Villagers progress through five trading levels: Novice → Apprentice → Journeyman → Expert → Master. Each level unlocks two new trade offers. A villager’s profession is determined by their job site block, place a Lectern and they become a Librarian: place a Composter and they’re a Farmer.
Here’s the critical part: if a villager has never been traded with, you can change their profession by breaking and replacing their job site block. Once you complete even one trade, their profession locks permanently. This is why you reroll Librarian offers before trading, place a lectern, check the first trade offer, and if it’s not what you want, break the lectern and place it again until you get Mending, Unbreaking III, Fortune III, or other key enchantments.
Essential Villager Professions: Top Trades for Maximum Profit
Not all villagers are created equal. Some professions are economic powerhouses: others are niche utility. Here’s what matters in 1.21/26.1.
Farmer (Composter): Buys crops, wheat, potatoes, carrots, pumpkins, melons, and sells bread, golden carrots, and glistering melons. This is your infinite emerald generator. Golden carrots are top-tier food for late-game hunger, making Farmers a two-in-one profit and utility source.
Fletcher (Fletching Table): Buys sticks and string, sells emeralds. Stupidly easy: break wood, craft sticks, trade for emeralds. No mining required. Pair multiple Fletchers for passive emerald income.
Librarian (Lectern): The most sought-after profession. They sell enchanted books, bookshelves, and name tags at Master level. Target books include Mending, Unbreaking III, Fortune III, Silk Touch, Protection IV, and Efficiency V. Having dedicated Librarians for each key book is non-negotiable for end-game preparation.
Cleric (Brewing Stand): Buys rotten flesh and sells Redstone, glowstone, Ender pearls, and bottles o’ enchanting. Useful for Redstone projects and XP grinding.
Toolsmith/Weaponsmith/Armorer (Smithing Table/Grindstone/Blast Furnace): Sell enchanted diamond tools, weapons, and armor. After discount mechanics, these trades drop the cost dramatically, saving you hours of mining.
Mason (Stonecutter): Buys stone and clay, sells decorative stone blocks and quartz. More niche but essential if you’re doing large-scale building.
Cartographer (Cartography Table): Sells explorer maps to Woodland Mansions and Ocean Monuments. Grab one if you’re hunting for rare loot.
Librarians, Farmers, and Weapon/Tool Smiths: Economic Powerhouses
Librarians are the foundation of your trading economy. Before placing a lectern, have multiple lecterns ready for rerolling. Check the first offer, if it’s trash, break and replace until you get a priority book. The key books to prioritize are Mending (most valuable), Unbreaking III, Fortune III, Silk Touch, Protection IV, and Efficiency V. Once you have these, level them to Expert or Master for additional copies or higher tiers.
Farmers provide endless emeralds with zero mining. Focus on stacking multiple Farmers in your trading hall. Harvesters can gather crops automatically, so the bottleneck is trading speed, not resource gathering. Stack them and trade in bulk to level multiple Farmers simultaneously.
Toolsmith and Weaponsmith trades become absurd once you apply discount mechanics (see next section). A full set of enchanted diamond armor at 1 emerald per piece is game-changing. This alone justifies building an optimized trading hall.
Advanced Trading Strategies: Price Discounts and Restocking
Raw villager trades are expensive. Zombification discounts are how you break the economy in your favor.
Let a zombie convert a villager to a zombie villager, then cure them with a Splash Potion of Weakness and a golden apple. Each successful cure applies a permanent personal discount to that villager. You can repeat this multiple times, cure the same villager 2-5 times for progressively steeper discounts, eventually dropping trades to 1 emerald.
Setup: Keep a zombie in a sealed chamber (behind trapdoors or pistons) that you can toggle. Lure a villager into the zombie’s range, let them get converted, quickly move them to a separate curing chamber, and apply Weakness + golden apple. Once cured, they’re permanently discounted for you.
Village-wide reputation also affects prices. Curing villagers increases reputation, lowering prices for all trades in that village temporarily. Hero of the Village status (obtained by winning a raid) gives additional discounts in that specific village for 100+ in-game minutes.
Restocking rules: A villager restocks up to twice per in-game day during working hours. They must be able to pathfind to their job site block and have an unclaimed bed. If a villager never restocks, check the time of day, confirm the workstation is accessible (no walls blocking their path), and verify they still have their profession. Also, make sure you haven’t maxed out the trade’s total uses, some trades have hard caps that persist until the next restock.
Pro tip: Keep your trading hall’s job site blocks at ground level with clear sightlines. Villagers are notoriously bad at pathfinding around obstacles.
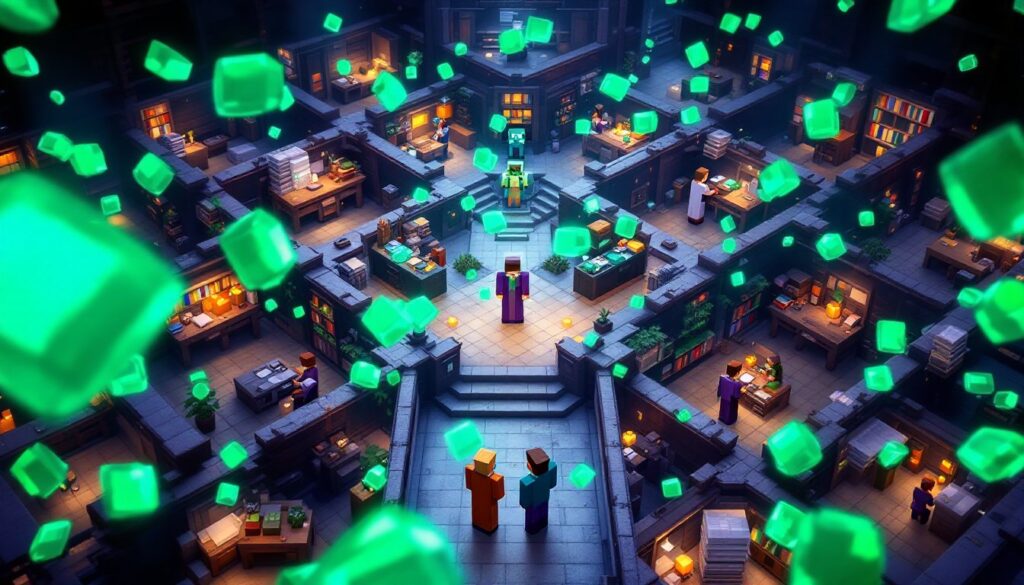
Building and Optimizing Your Villager Trading Hall
A solid trading hall is the backbone of your economy. Here’s the layout that works in 1.21/26.1.
Core setup: Individual cells for each villager with a bed (optional but helpful for organizing breeding), their job site block, and safe containment using trapdoors, boats, minecarts, or fences. You need direct access to each villager for trading and zombie conversion without them escaping or taking sun damage during the conversion process.
A central corridor lets you move between cells quickly and trade with multiple villagers in sequence. Rail systems or water streams transport villagers into their cells during setup. Name them using name tags if you want to preserve them, though if your hall is secure, they won’t despawn even without tags.
Profession distribution: Stock multiple Farmers and Fletchers for emerald generation. Dedicate several Librarians to different key books, don’t put all your “Mending” eggs in one basket. Include at least one of each Smith type, an Armorer, Cartographer, Cleric, and Mason depending on your playstyle.
For zombification setup, keep a controlled zombie behind trapdoors or pistons. Toggle exposure carefully, you don’t want the zombie despawning or getting sunburned. The curing chamber should be sealed to prevent the villager from wandering off mid-cure.
Safety: Light up the entire hall and surroundings to prevent hostile spawns. Ensure no gaps for raids to breach your defenses. If you’re on chunk borders, chunk-load the area or revisit regularly so villagers stay in a loaded state. How to Make a covers name tag sourcing if you want permanent identification.
Common Villager Trading Issues and How to Fix Them
Villager won’t take a profession: Another villager claimed that job site block. Move blocks farther apart, break unused workstations, or isolate the villager in a separate room with only one job site block.
Trades not restocking: Confirm it’s daytime (working hours), the workstation is reachable with no path-blocking obstacles, and the villager isn’t a Nitwit or child. Also verify the trade hasn’t hit its hard cap, some high-level trades max out at 1 use per restock.
Prices suddenly skyrocket: You attacked or killed a villager, triggering negative reputation. Over-using a single trade can also spike prices temporarily. Wait several in-game days for reputation to reset, or run another zombification cure cycle on additional villagers to boost village-wide reputation and offset the damage.
Can’t reroll Librarian trades: Once you trade even once, their offers lock permanently. Use a different villager that’s never been traded with and a fresh lectern. This is why pre-planning which Librarians you need matters, always reroll before committing to any trade.
Zombification conversion failing: Ensure the zombie can actually reach the villager. Use piston pushes or water streams to move the zombie and villager closer. Also confirm the area is dark enough, mobs can despawn in daylight. Keep the conversion chamber covered.
For advanced troubleshooting, resources like Game Rant often have detailed walkthroughs when mechanics shift between versions. Always check your game version to see if patch notes changed villager behavior.
 Sheep In Minecraft: Your Complete Farming & Breeding Guide For 2026
  Minecraft Saddle Recipe: Why You Can’t Craft One and How to Get It Fast in 2026
  The Ultimate Guide to Minecraft Farms: Boost Your Survival Game in 2026
  How to Breed Villagers in Minecraft: A Complete Guide for 2026
  The Complete Guide to Minecraft Farms: Build, Automate, and Maximize Your Yields in 2026
  Minecraft Potion Recipes: The Complete Brewing Guide for 2026