
Minecraft Potion Chart 2026: Your Complete Guide to Brewing Every Potion
Brewing potions in Minecraft is one of the most rewarding, and underrated, survival mechanics in the game. Whether you’re gearing up for the Ender Dragon fight, farming mobs through the night, or just trying to move faster, the right potion can completely change your playthrough. The Minecraft potion chart might look intimidating at first glance, with dozens of combinations and modifiers, but it’s actually built on a handful of simple rules. Once you understand how the brewing stand works and what ingredients do what, you’ll be mixing custom effects faster than you can say “Awkward Potion.” This 2026 guide breaks down everything you need to know: from setting up your first brewing stand to creating advanced utility potions that’ll give you the edge in combat or exploration. Let’s get started.
Key Takeaways
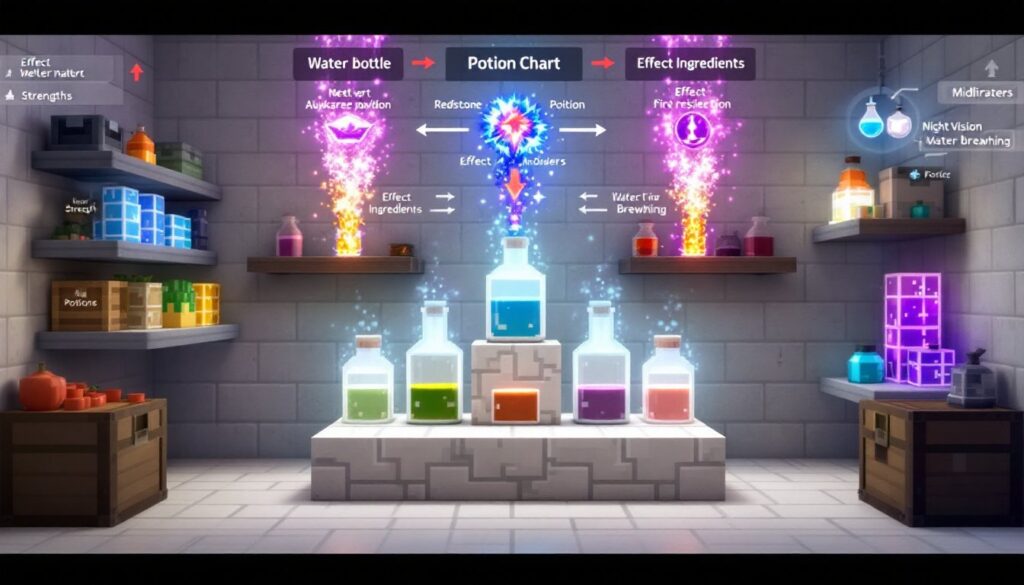
- Every Minecraft potion follows the same creation path: Water Bottle → Awkward Potion → Effect Ingredient → Optional Modifiers, making the potion chart intuitive once you understand the pattern.
- Strength and Fire Resistance are the two essential combat potions that separate casual players from serious survivors, with Strength adding 3-6 damage per hit and Fire Resistance providing complete immunity to Nether hazards.
- Always brew three potion bottles simultaneously in your brewing stand, since the ingredient cost is identical whether you brew 1 or 3 potions, maximizing efficiency.
- Set up a Minecraft potion chart strategy around your playstyle: extended duration potions for survival, amplified potions for PvP burst damage, and splash variants for multiplayer raids.
- Pre-brewing large batches of Awkward Potions when idle and establishing early Nether Wart farms eliminates ingredient bottlenecks and allows you to focus on advanced brewing recipes.
- Water Breathing and Slow Falling potions become game-changers for late-game exploration and base building, enabling underwater development and fall-damage immunity from any height.
Understanding Minecraft Potion Basics
Before you touch a brewing stand, you need to understand how potions actually work in Minecraft.
Every potion follows a simple creation path: Water Bottle → Awkward Potion (the universal base) → Effect Ingredient → Optional Modifiers. The Awkward Potion is your foundation for nearly every useful potion in the game, created by adding Nether Wart to water.
Each brewing step takes exactly 20 seconds, and you can brew up to three bottles simultaneously, making batch production efficient. Potions provide timed effects ranging from combat buffs like Strength to utility effects like Night Vision. Some potions, like healing potions, work instantly. Others, like Regeneration, tick over time.
Key modifier ingredients include:
- Redstone: Extends potion duration (approximately 8 minutes instead of 3)
- Glowstone Dust: Amplifies potion level (Strength II instead of Strength I) but cuts duration in half
- Gunpowder: Converts the potion to splash version for area effects
- Dragon’s Breath: Converts splash potions to lingering versions that leave clouds
One critical thing: you can’t make a potion that’s both longer AND stronger with modifiers. You choose: extended duration or increased power. Most players prefer duration for survival and utility potions, but competitive PvP often demands the extra damage from amplified potions.
How to Brew Potions: The Complete Process
The brewing process itself is straightforward once you have the materials. Here’s the step-by-step:
Step 1: Gather Materials
- Craft Glass Bottles (3 glass per bottle)
- Fill bottles at any water source
- Find or craft a Brewing Stand (1 Blaze Rod + 3 Cobblestone)
- Get Nether Wart from the Nether
- Collect Blaze Powder (grind Blaze Rods in a crafting table) to fuel the stand
Step 2: Set Up Your Brewing Stand
Place the stand and add Blaze Powder to the fuel slot. One Blaze Powder fuels approximately 20 brewing operations, so keep extras nearby.
Step 3: Brew Awkward Potions
Place up to 3 Water Bottles in the bottom three slots. Add Nether Wart to the top ingredient slot. Wait 20 seconds. You now have Awkward Potions.
Step 4: Add Your Effect Ingredient
Keep the potions in place, remove the Nether Wart, and add your chosen effect ingredient (Sugar for Swiftness, Blaze Powder for Strength, etc.). Wait another 20 seconds.
Step 5: Modify (Optional)
If you want extended duration, add Redstone. If you want amplified effects, add Glowstone Dust. If you want splash potions for area coverage, add Gunpowder.
Setting Up Your Brewing Stand
A proper brewing setup saves hours of tedious clicking. Here’s what experienced players build:
The Essentials:
- 2–4 brewing stands arranged for batch processing
- Infinite water source or cauldron nearby (water buckets get tedious)
- Organized storage for Nether Wart, Blaze Powder, Redstone, and Glowstone Dust
- Quick access to ingredient farms
Pro Setup Tips:
- Keep a Nether Wart farm directly above or adjacent to your brewing area. This is your bottleneck ingredient.
- Use hoppers and furnaces to automate Blaze Powder production if you’re in creative or have good access to Blaze Rods.
- Pre-brew large batches of Awkward Potions when you’re idle. These store indefinitely and serve as your potion “currency.”
- Label your storage clearly. Nothing’s worse than grabbing Fermented Spider Eye when you meant to grab Magma Cream.
Consider placing your brewing setup in a central hub or base, you’ll visit it constantly during progression.
Essential Potions Every Player Needs
These are the potions that separate casual players from people who actually get things done. Focus on these first: the rest are situational.
Combat & Survival Core:
Strength (Blaze Powder ingredient), Adds 3 damage per hit (or 6 with Glowstone). Durations: 3 minutes standard, 8 minutes extended. This is your primary damage buff for boss fights, raids, and tough combat situations. A player with Strength II can one-shot many mobs.
Fire Resistance (Magma Cream ingredient), Complete immunity to fire, lava, and Magma Blocks for 3 minutes (or 8). Essential for Nether exploration. Don’t negotiate on this one.
Regeneration (Ghast Tear ingredient), Fast health recovery. Standard duration is only 45 seconds, extended is 1:30. Not as impressive as it sounds: bring food as your primary healing instead. Useful for recovering quickly after a fight.
Healing (Glistering Melon Slice ingredient), Instant health. Level I restores 4 health: Level II restores 8. Splash versions are crucial for reviving teammates in multiplayer or rapid combat recovery.
Exploration & Utility:
Night Vision (Golden Carrot ingredient), Brightens darkness for 3 minutes (8 extended). Better than torches for caves and underwater. No disadvantages: purely quality-of-life improvement.
Water Breathing (Pufferfish ingredient), Breathe underwater for 3 minutes (8 extended). Required for underwater exploration and building. Every Minecraft player should have a stack of these.
Slow Falling (Phantom Membrane ingredient), Negates fall damage and slows descent for 1:30 (4 extended). Absolute game-changer for late-game base building. You can jump from any height without dying.
Weakness (Fermented Spider Eye + Water Bottle, no Awkward needed), Reduces attack damage and is mandatory for curing zombie villagers. This is the only potion that doesn’t use Awkward as a base. Splash versions are required if you’re saving villagers.
Prioritize brewing these in batches. A solid starter stock is 30–50 of each, depending on your play style. For PvE players, splash potions are optional. For multiplayer PvP, they’re essential.
Advanced and Specialty Potions
Once you’ve mastered the essentials, these potions open up new strategies, especially in PvP and mob farms.
Leaping (Rabbit’s Foot ingredient), Increases jump height dramatically and reduces fall damage. Durations: 3 minutes (8 extended). Useful for parkour challenges and traversal, but not essential for combat.
Swiftness (Sugar ingredient), Movement speed boost. Level I adds 20% speed: Level II adds 40%. Durations: 3 minutes (8 extended). Competitive PvP players use this constantly. Splash versions let you buff teammates mid-fight.
Invisibility (Golden Carrot + Fermented Spider Eye ingredient), You become invisible to most mobs for 3 minutes (8 extended). The catch: Endermen still see you, and Spiders/Cave Spiders detect by sound. Useful for stealth and mob farming setups, not for general combat.
Poison (Spider Eye ingredient), Damage-over-time effect that drains health to 0.5 hearts. Durations: 45 seconds (1:30 extended) or 22 seconds (0:44 extended at Level II). Never quite kills you in vanilla, making it more of a nuisance than a threat. Situational in PvP where it synergizes with knockback combos.
Harming (Glistering Melon Slice + Fermented Spider Eye), Instant damage. Level I deals 6 damage: Level II deals 12 damage. Healing potions on undead mobs actually harm them, and vice versa. Critical for mob grinder automation and specific PvP combos.
Slowness (Phantom Membrane or Fermented Spider Eye routes), Reduces movement speed. Durations: 1:30 (4 extended) or 20 seconds amplified. Primarily a tool for mob control and grinding setups.
Turtle Master (Turtle Shell ingredient), Grants Resistance III (reduced damage taken) plus Slowness. Durations: 20 seconds (40 extended) or 5 seconds amplified. Tanky players use this as a survival button. The Slowness is a downside, but Resistance III is incredibly potent.
Lingering Potions, Created by adding Dragon’s Breath to splash potions. These create clouds that persist for 30 seconds. Lingering Harming clouds are critical for automated mob farms: lingering Invisibility or Swiftness clouds add chaos to PvP battles. Farming Phantom Membranes (by skipping sleep) is the bottleneck for lingering potion production.
Tips for Efficient Potion Brewing
Efficiency is everything when you’re brewing dozens of potions. Here are veteran-level tactics:
Always brew 3 bottles at once. The ingredient cost is identical whether you brew 1 or 3 potions. Using all three slots is non-negotiable.
Pre-stage your ingredients. Have Awkward Potions ready to go. The bottleneck in potion production isn’t the brewing stand, it’s gathering ingredients. Pre-brew Awkward in bulk and store them. They don’t expire.
Establish ingredient farms early. Nether Wart takes time to grow and is the primary blocker. Sugar cane and melons are fast and worth automating. Golden Carrots require tons of gold nuggets from bartering with Piglins. Plan accordingly.
Fuel management: Keep Blaze Powder plentiful. One powder fuels about 20 operations. For serious brewing, automated Blaze Rod farms pay for themselves in weeks.
Redstone vs. Glowstone decision: Most survival players prefer extended duration for combat and utility potions. Glowstone is better for burst damage in PvP. Pick one direction and stick with it, switching mid-session wastes ingredients.
Splash for multiplayer, standard for solo. Splash potions are only marginally useful in single-player unless you’re running a specific mob farm. In multiplayer raids or PvP, they’re mandatory. Gunpowder is reasonably farmable near dungeons or from Creepers.
Consider your playstyle. Peaceful players need almost nothing. Survival players live off Strength and Fire Resistance. Speedrunners need Strength and Swiftness. PvP players need everything except Weakness (unless fighting zombies). Build your potion priorities around what you actually do.
You can also find detailed brewing charts on Game8’s Minecraft potion guide for reference, though once you understand the base → ingredient → modifier flow, custom recipes become intuitive.
Conclusion
The Minecraft potion chart is intimidating only until you see the pattern: Awkward Potion + Effect Ingredient + Optional Modifiers. Master these three layers, and you can brew anything the game offers. Set up a brewing station with reliable ingredient farms, stock your essential potions, and expand to situational brews as you unlock new play styles. Whether you’re preparing for a raid, curing villagers, or chasing PvP wins, potions are a non-negotiable part of late-game Minecraft. Start brewing today.
 Sheep In Minecraft: Your Complete Farming & Breeding Guide For 2026
  Minecraft Saddle Recipe: Why You Can’t Craft One and How to Get It Fast in 2026
  The Ultimate Guide to Minecraft Farms: Boost Your Survival Game in 2026
  How to Breed Villagers in Minecraft: A Complete Guide for 2026
  The Complete Guide to Minecraft Farms: Build, Automate, and Maximize Your Yields in 2026
  Minecraft Potion Recipes: The Complete Brewing Guide for 2026